
|
|
||||
|
|
||||||||||||||

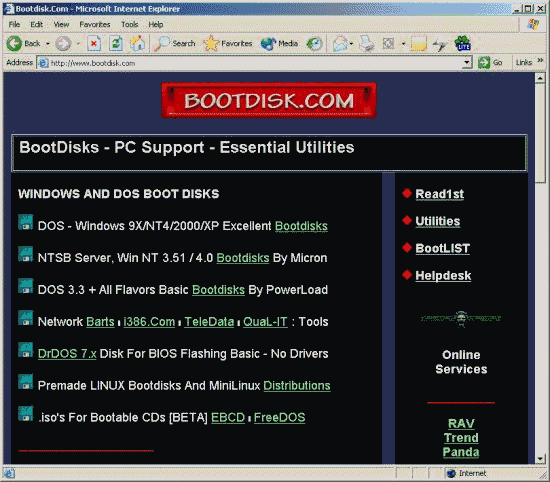
1. Make your plan To create a bootable cd-rom is not every time a simple process. Be sensible and don't waste cd's. Experiment with rewriteable cd's and burn if you are sure you disc content is ok. 2. Check Bios Check your BIOS (Basic Input Output System) for supporting boot from a cd-rom. 3. Start up files If you don't have the right startup files, go through the website http://www.bootdisk.com. On this website you will find a variety of help files for creating a boot disc or bootable cd-rom. You can almost download these files for free.
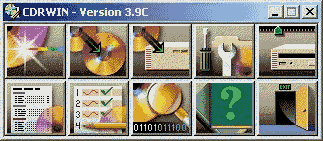
4. Download software In this example I use the program CDRWIN from Golden Hawk Technology. You can download this program at the following URL: http://www.goldenhawk.com. This is a trial version, but it's use the fully functionality. But it's has one limitation, you can only burn on singular speed. 5. Collect the requirements Earlier you have read that you can use a exist boot file to make your own cd-rom. These files you can find on bootable cd's , for example on the Windows 2000 or XP cd-rom. Take a useful cd-rom. You don't have a bootable cd-rom? No worries. On the Internet, for example on http://home.online.no/~msols/bootfiles.zip you find a zip file within execute files you can use for your project. Open CDRWIN against Start -> Programs -> Golden Hawk Technology -> CDRWIN. After starting you will see a window with icon buttons (see picture 1).
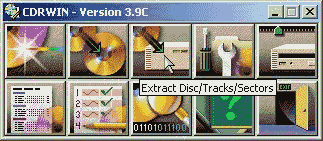
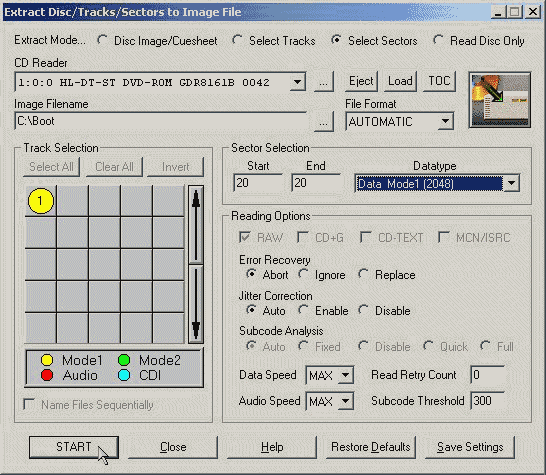
From these icons we use a few options. Just start with de button Extract Disc/Track/Sectors, click on it (see picture 2). A new properties window appear (see picture 3).
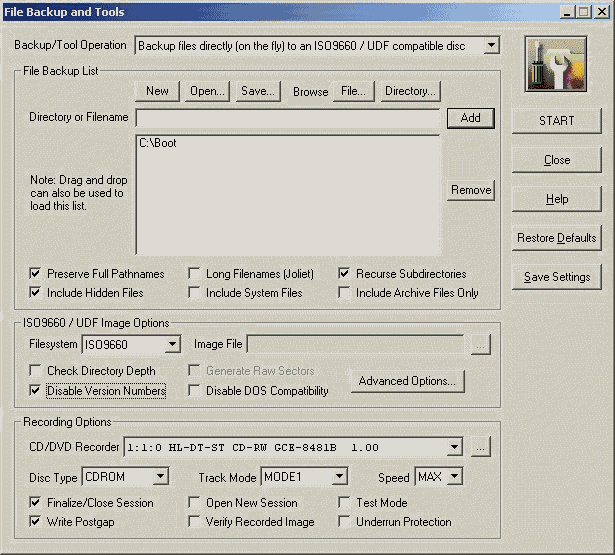
6. Read out the boot files Place the existing bootable cd-rom in your cd-rom drive. It's now time to copy the boot files from your existing bootable cd-rom to your own cd-rom. In my example we use the bootable cd-rom from Microsoft Windows 2000. You can skip this step if you have already downloaded these files via the hyperlink above: read out is then not necessary. On top in the opened window you select the mode Select Sectors. In the input field Image Filename, you fill in on which location the boot files need be copied. For this create a different temporary folder, for example C:\Boot. Do you have more cd-rom players, then check if the right cd-rom player is selected in the choice list under CD Reader. In the group box Sector Selection, you fill in for Start and End the value 20. In this window you fill see also a choice list Datatype. Choose for Data Mode 1 (2048). You are now ready to read out. Click on the button Start left under in the window (see picture 3). The next steps After you returned in the main window of CDRWIN, click on the button File Backup and Tools. A new window will be opened (see picture 4). In the choice list against Backup/Tool Operation choose for the option: Backup files directly (on the fly) to an ISO9660 / UDF compatible disc. In the group box File Backup List click on the button Directory, go through the folder where the files are stored and click on the OK button.
Next click on Add to put the folder on the list with files. In the same box make sure the following options are checked: Include Hidden Files and Recurse Subdirectories. In the group box ISO9660 Options place a check for Disable Version Numbers, after this click on the button Advanced Options. A extra window will be opened (see picture 5).
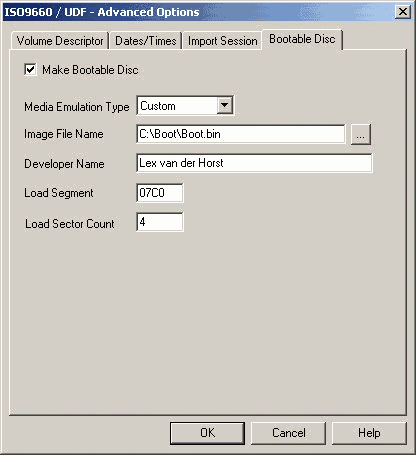
7. Advanced Options On the first tab (Volume Descriptor) you will give in the input field Volume Label the name of the cd-rom. In my example, we use for the Window 2000 the label W2KWS_UK. Don't touch any other options in this tab. The other two Dates/Times and Import Session you will let it undisturbed. The last tab, Bootable Disc, is very important. Place a check with the option Make Bootable Disc. Next you choose against Media Emulation Type for the adjustment Custom. Against the input filed Image File Name fill in the fully path and the filename for the copied boot-file. You can always use the browse button to point to the boot file. In the Developer Name input field can fill in anything you want. Against the Load Segment check precise or the value 07C0 is correctly filled in. And at least, but not unimportant, you must check if the value 4 has been filled in. Click on the OK button to save your settings and return back to the previous option window.
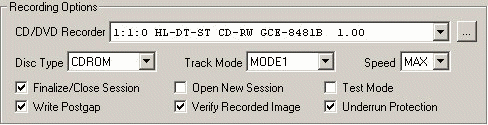
8. For future use To finalize the adjust process check the options "Verify Recorded Image" and "Under run Protection" in the group box Recording Options. Click on the Save Settings button to save your work for future use. 9. Burn Are you ready? Click on the Start button to start the burn
process. The cd will now be recording. After the recording period
you will test if the cd-rom working correctly. You will do this to
boot your pc from cd-rom. Good luck. Lex van der Horst.
|
|
|
|
|
|
|
|
|
|